CCConnectCraft AIHighLevel Lead Guide
ConnectCraft AI Training Library

HighLevel Lead Generation Master Guide

A growing resource for learning practical ways to capture leads using HighLevel. Start with the completed Facebook Comment Automation walkthrough, then check back as new lead-generation methods are added.

22lead methods mapped
1completed guide added
22screenshots included
Abstract HighLevel lead generation automation system
How to use this guide

Choose a lead path, follow the steps, and build as you go.

Each completed method includes a clear overview, setup guidance, step-by-step instructions, screenshots, testing notes, and practical tips you can apply inside your own HighLevel account.

Website & Funnels

Landing Page Opt-In FunnelComing Soon
2-Step FunnelComing Soon
Quiz or Survey FunnelComing Soon
Website Chat WidgetComing Soon
Embedded Form on Website or BlogComing Soon

Phone & SMS

Missed Call Text BackComing Soon
SMS Keyword CampaignComing Soon
QR Code to FunnelComing Soon

Booking & Events

Free Discovery Call FunnelComing Soon
Webinar or Workshop Registration PageComing Soon
Waiting List FunnelComing Soon

Email & Outreach

Email Broadcast with Opt-In LinkComing Soon
Cold Outreach SequenceComing Soon
Referral WorkflowComing Soon

Review & Reputation

Google Review Request to Lead CaptureComing Soon
Google My Business MessagesComing Soon

WhatsApp

WhatsApp Keyword AutomationComing Soon

Video walkthrough coming soon

A video walkthrough will be added here to show this automation being built step by step inside HighLevel.

Video coming soon
01

Connect Your Facebook Page

Before anything, go to Settings → Integrations → Facebook/Instagram card → Connect. Log into the correct Facebook account, approve all permissions, select your Facebook Page, and click Connect and Continue. You must be an Admin of the Facebook Page to connect it.

Settings → Integrations → Facebook/Instagram card
02

Build the Workflow

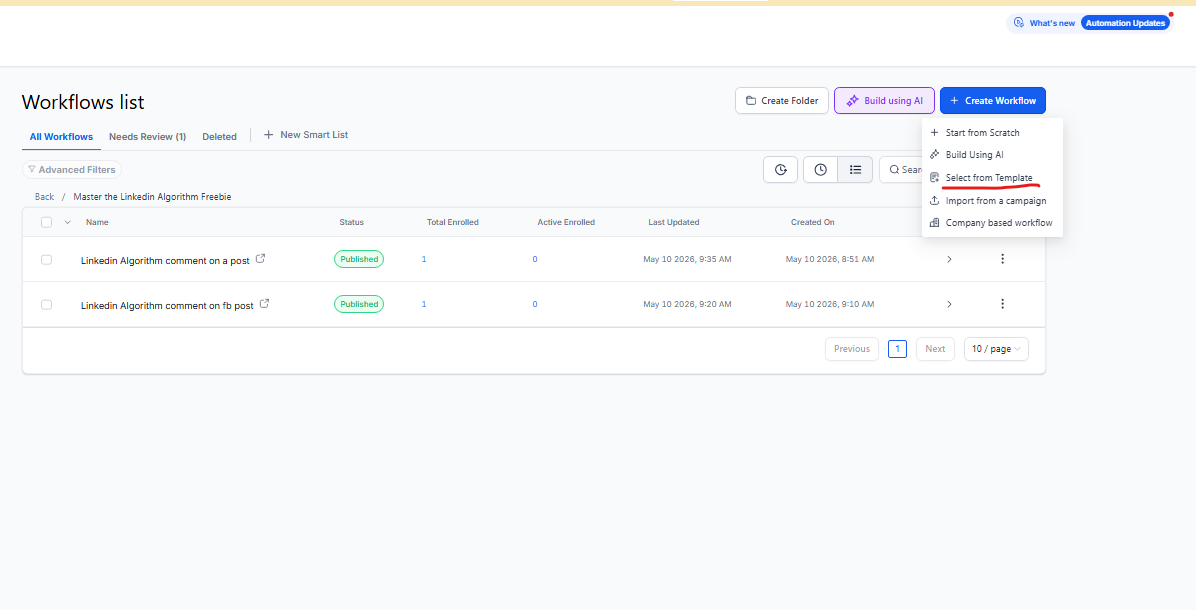
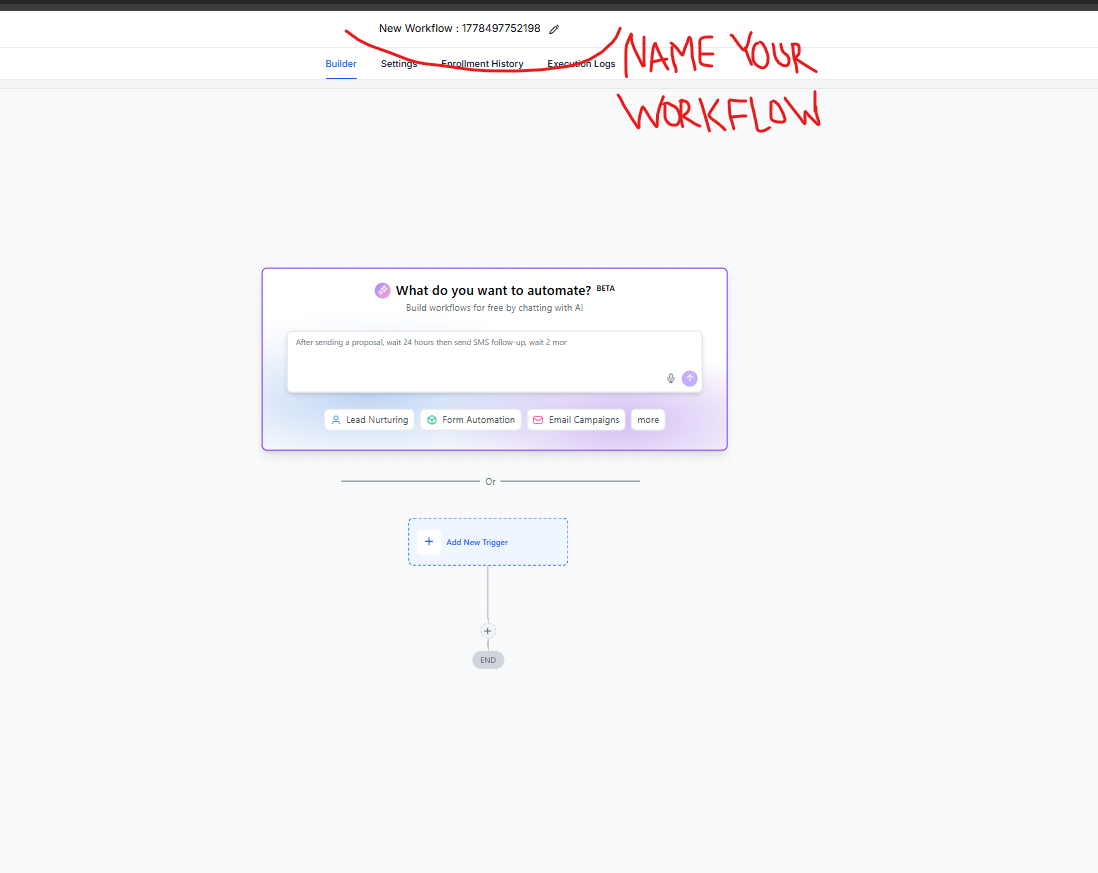
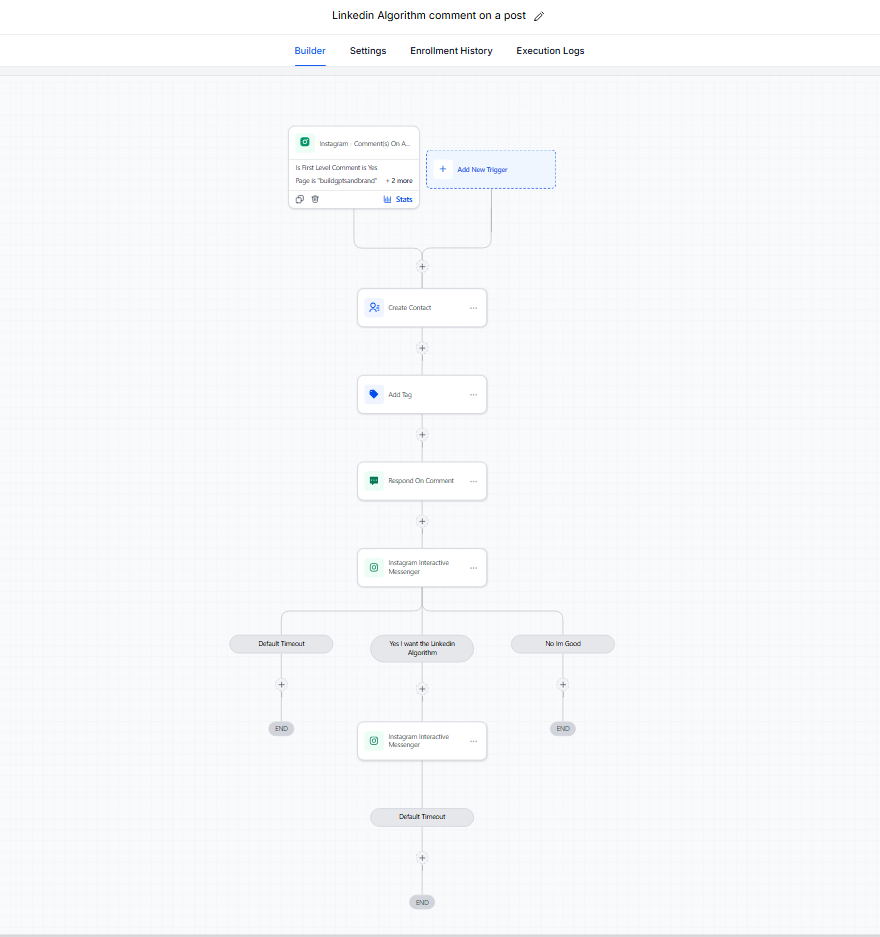
Go to Automation → Workflows → + Create Workflow → Start from Scratch, or choose a Facebook automation template. Create a new workflow and give it a clear name before adding the automation steps.

Open Automation from the HighLevel sidebar
Click the blue Create Workflow button
Workflow list after opening the Workflows area
Name Your Workflow before building the automation
03

Set the Trigger

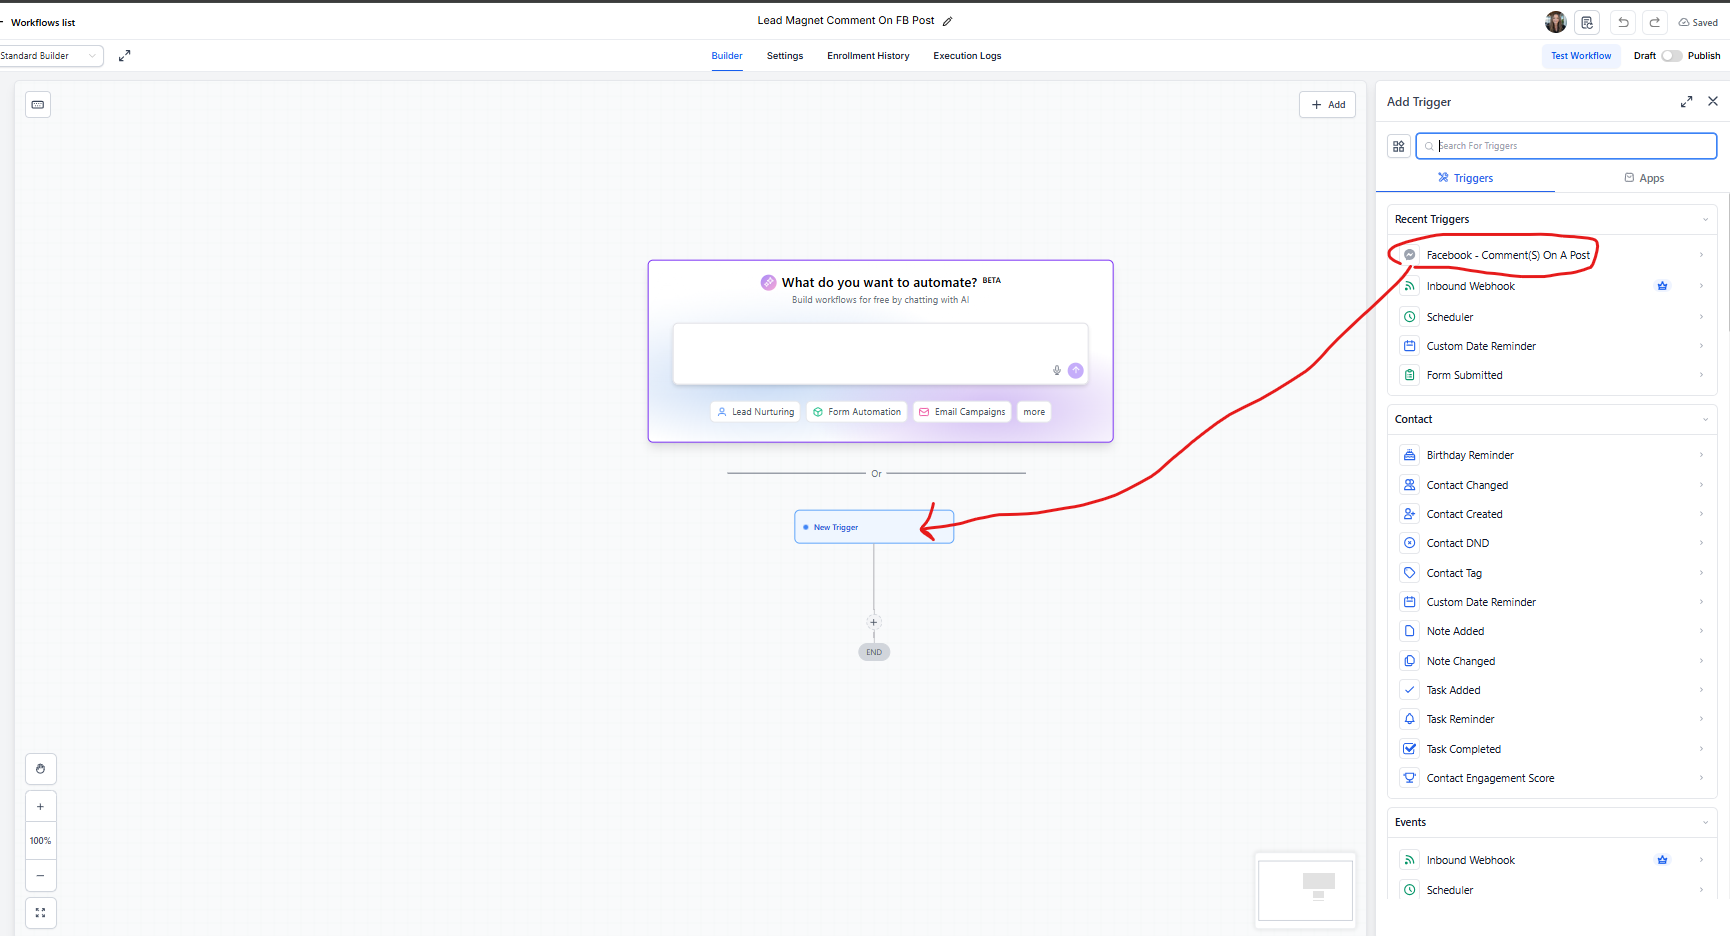
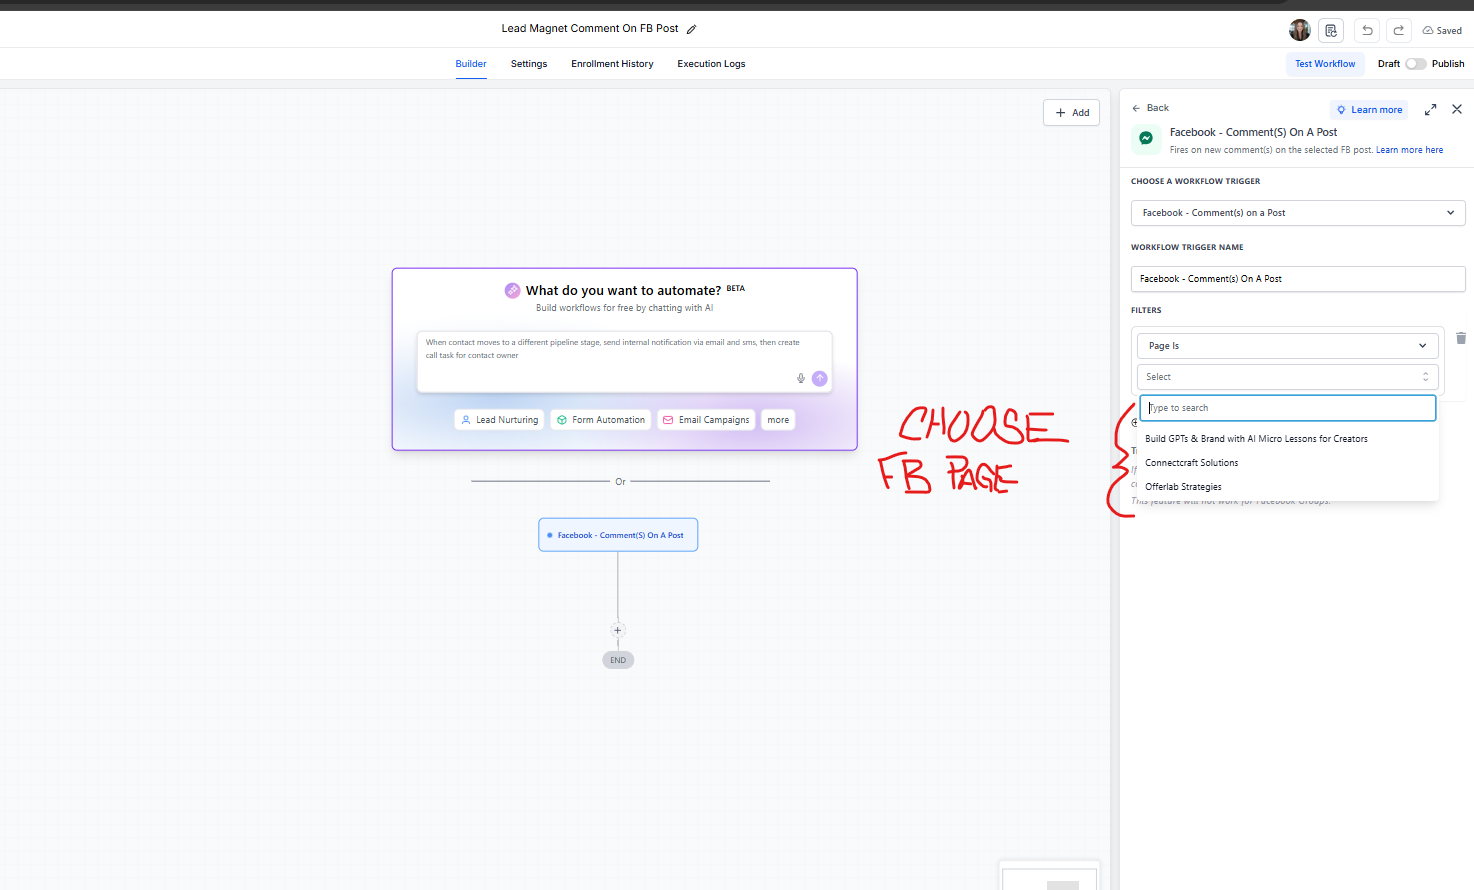
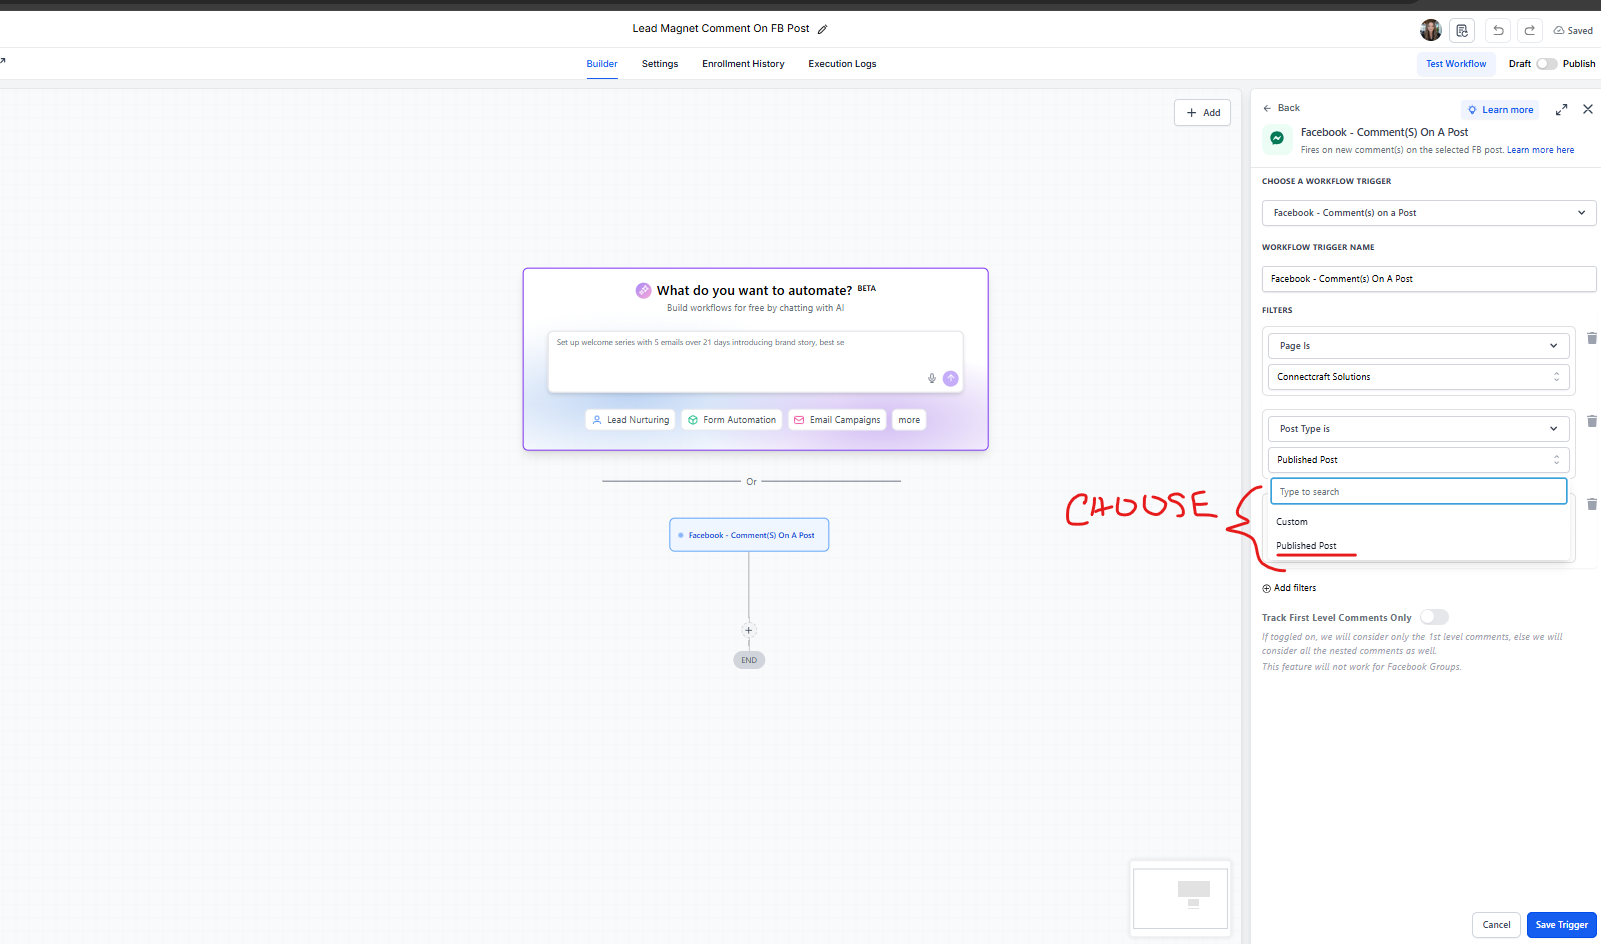
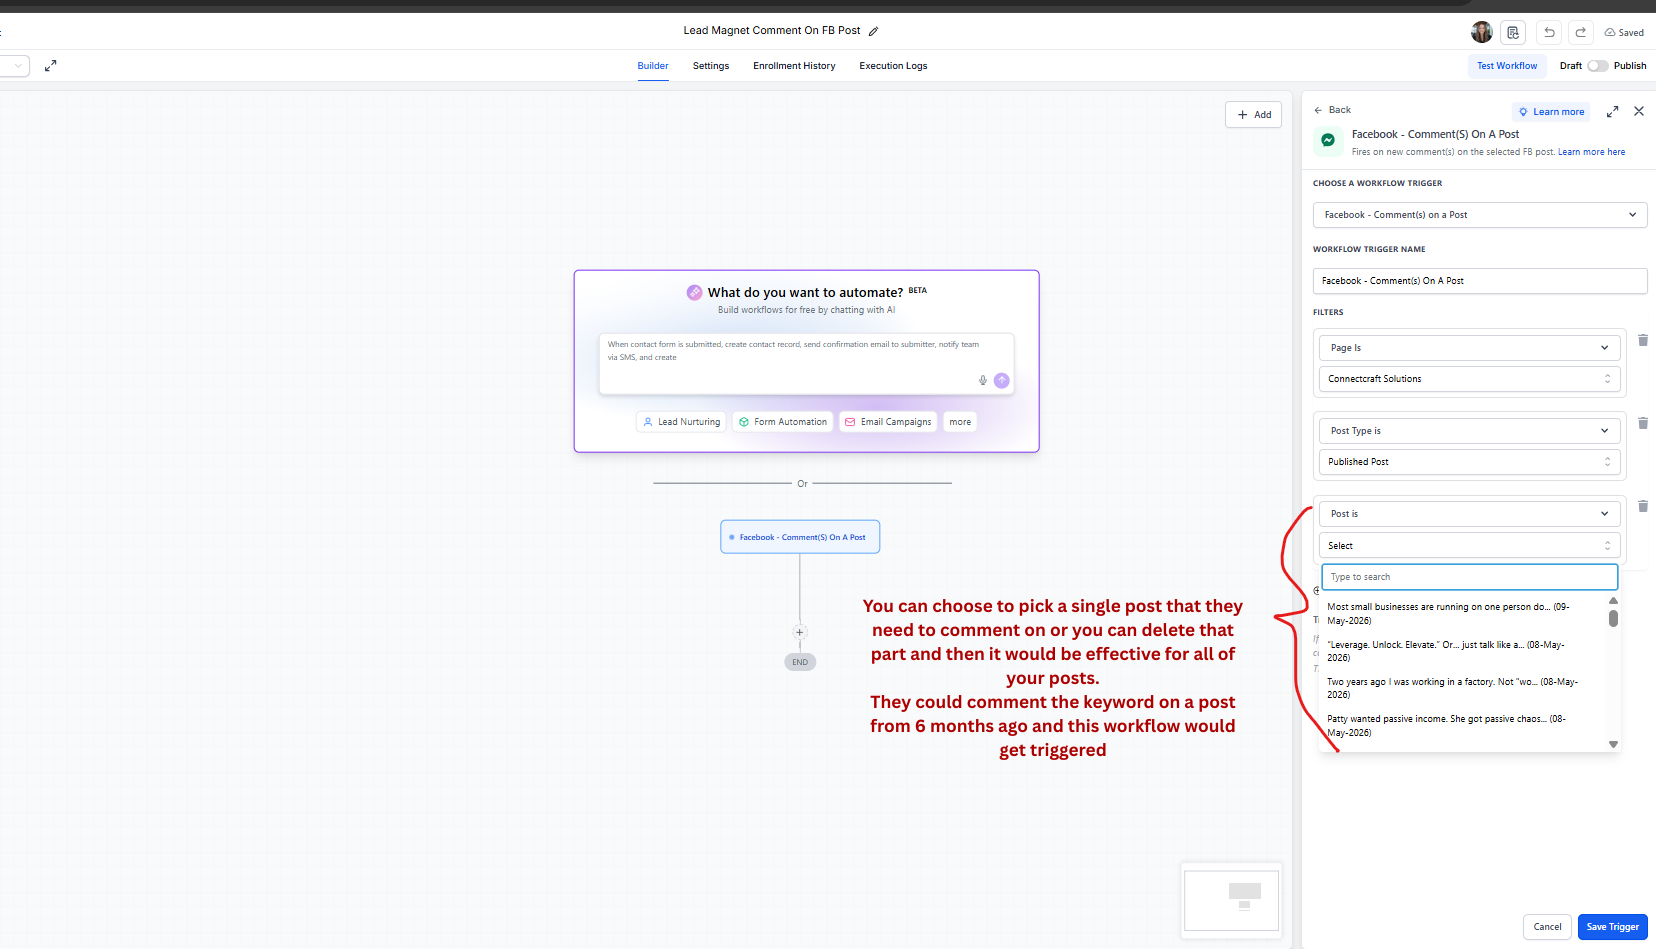
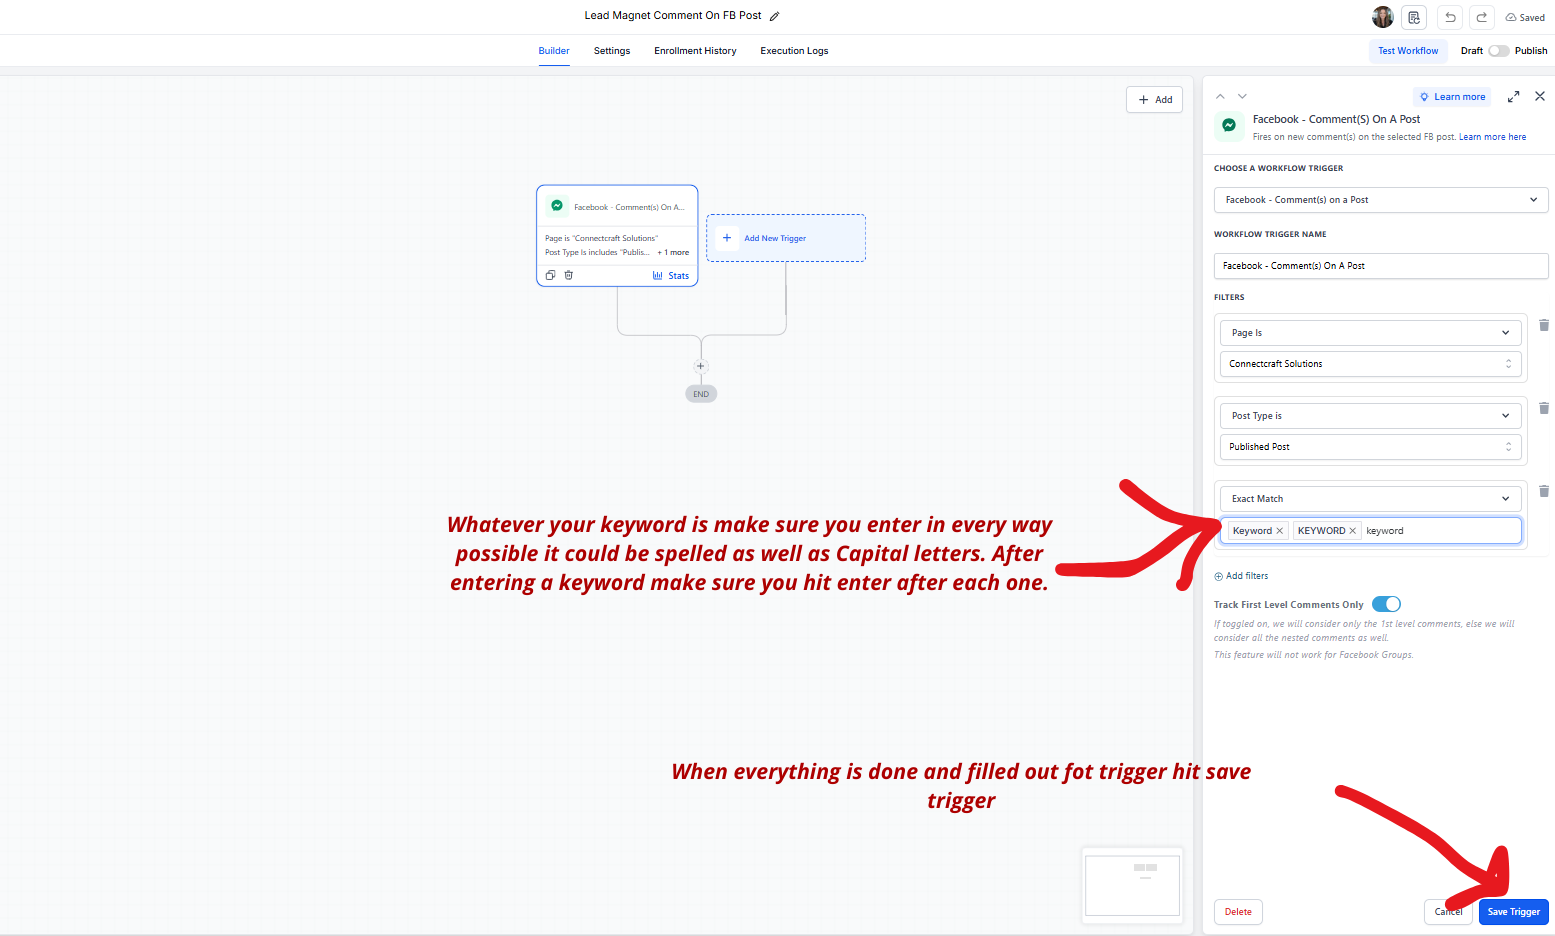
Click Add Trigger and search for User comments on a Post under the Facebook/Instagram Events category. In the trigger sidebar, select your Facebook Page, choose the Post Type, and then set the keyword filter.

Start from scratch, click Add Trigger, and search Facebook/Instagram Events
Select the correct Facebook Page in the trigger sidebar
Choose the Post Type field
Published Post or Custom Post settings
Keyword filter and First-level comments only setting
04

Add Action #1 — Reply to the Comment Publicly

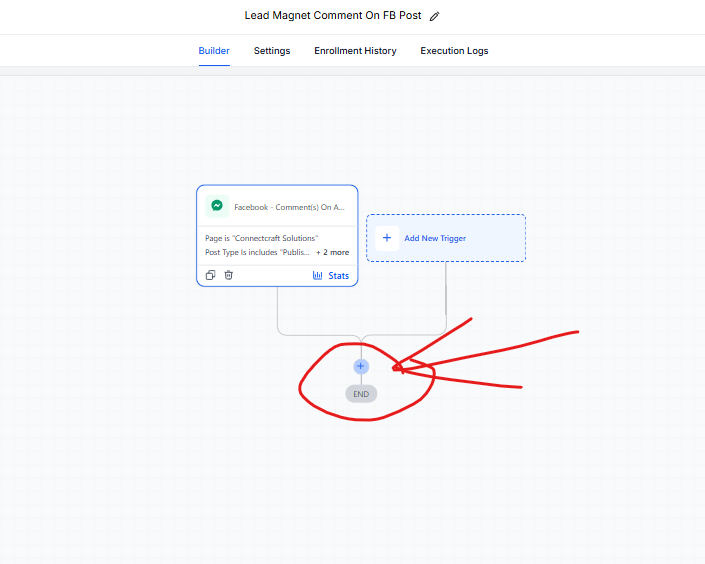
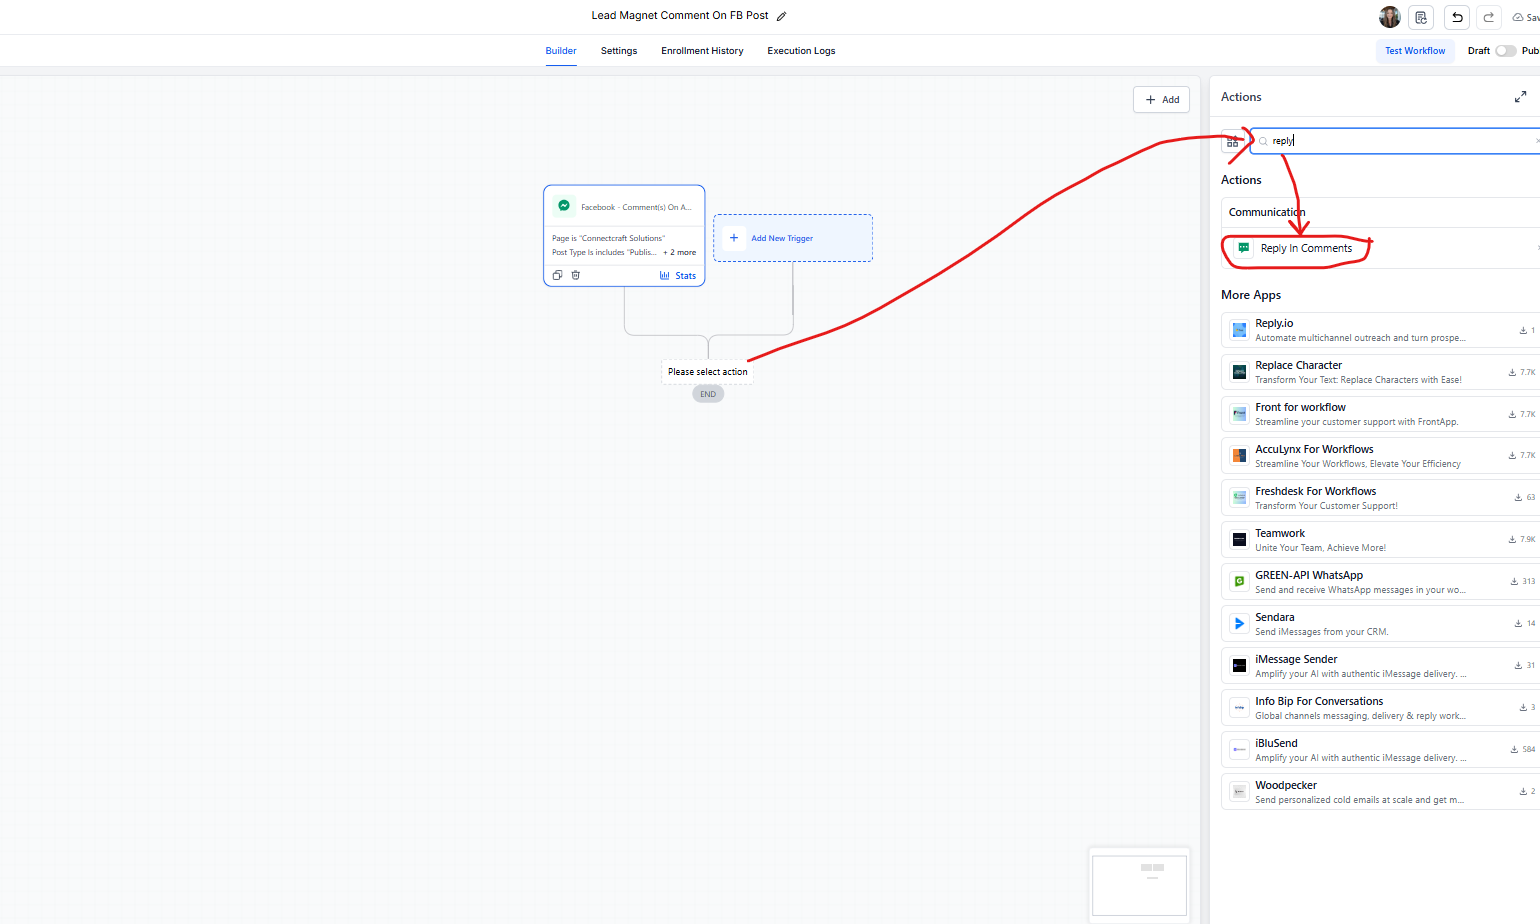
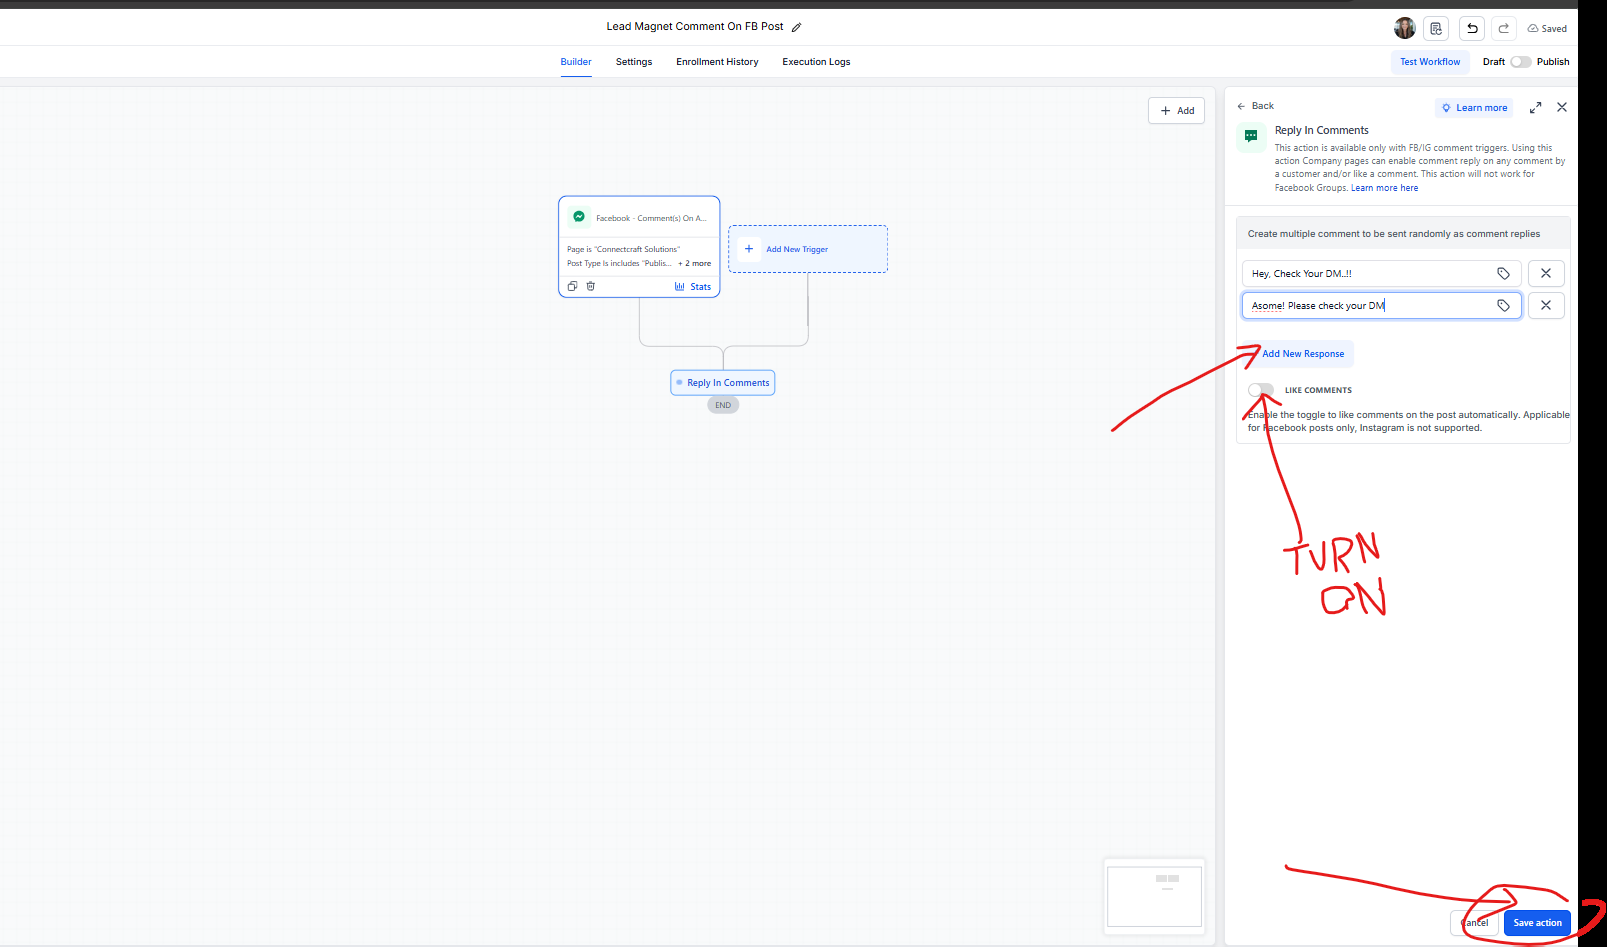
This lets everyone see there is a DM coming, which creates helpful social proof. Click + Add Action, choose Reply to Comment, and write something simple such as Sent! Check your DMs.

Click the plus button under the trigger to add the next action
Choose Reply to Comment from the action list
Write the public reply and turn the action on
05

Add Action #2 — Send the Lead Magnet via DM

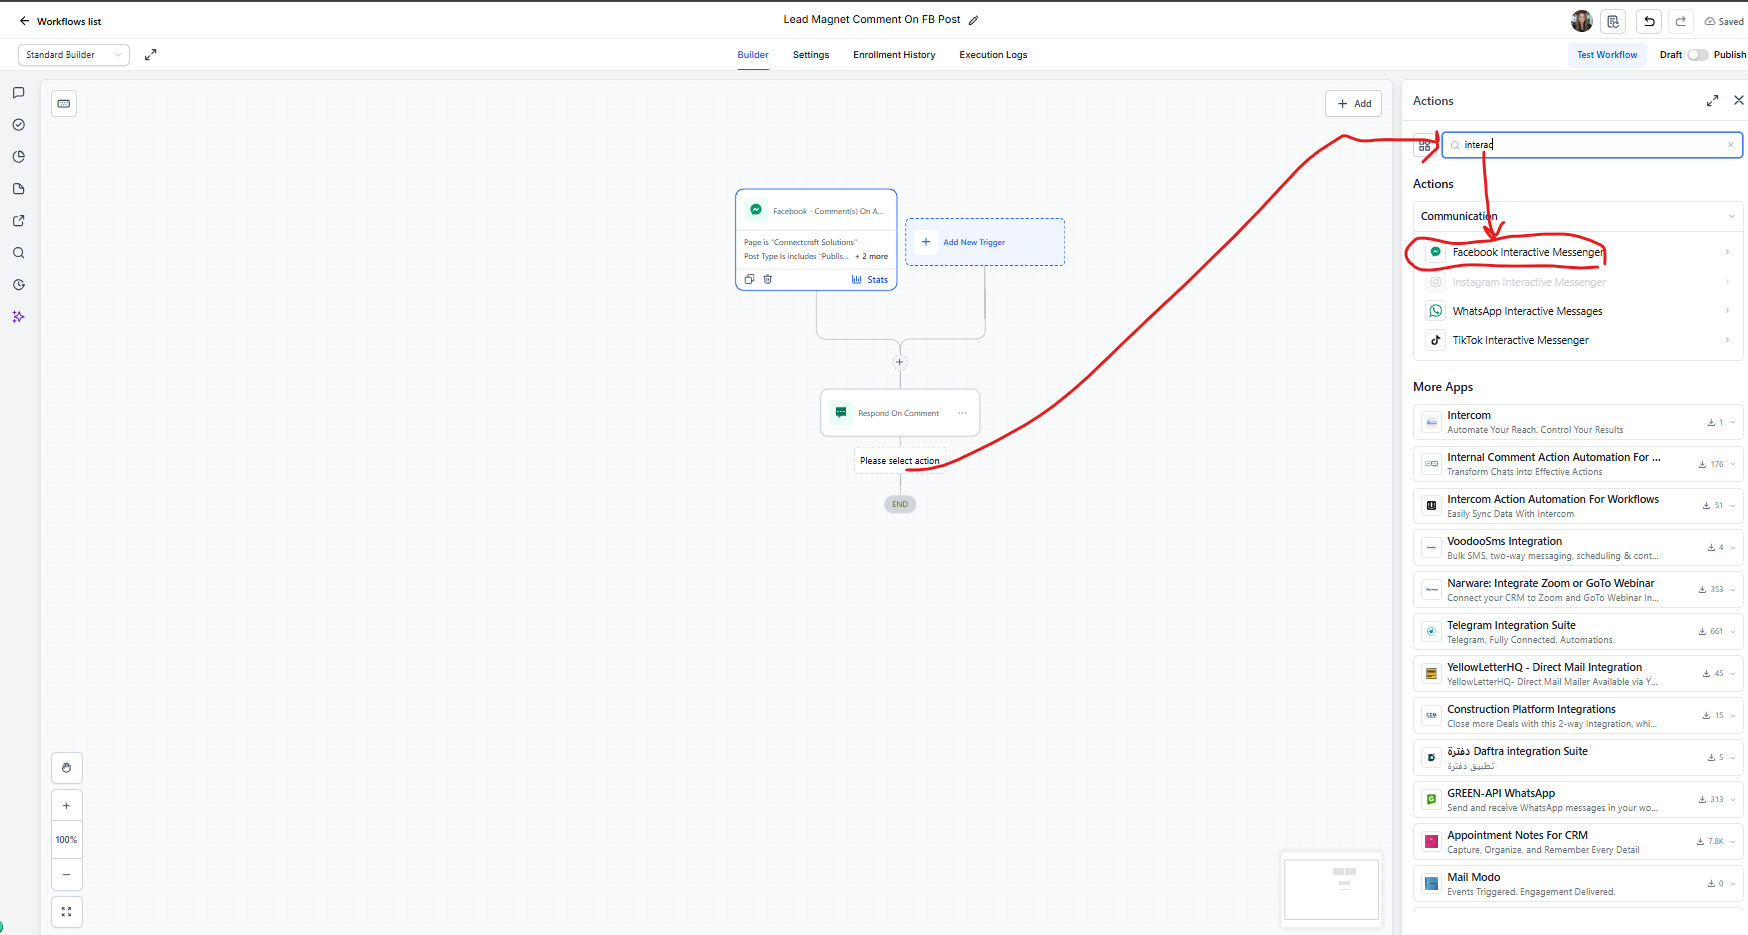
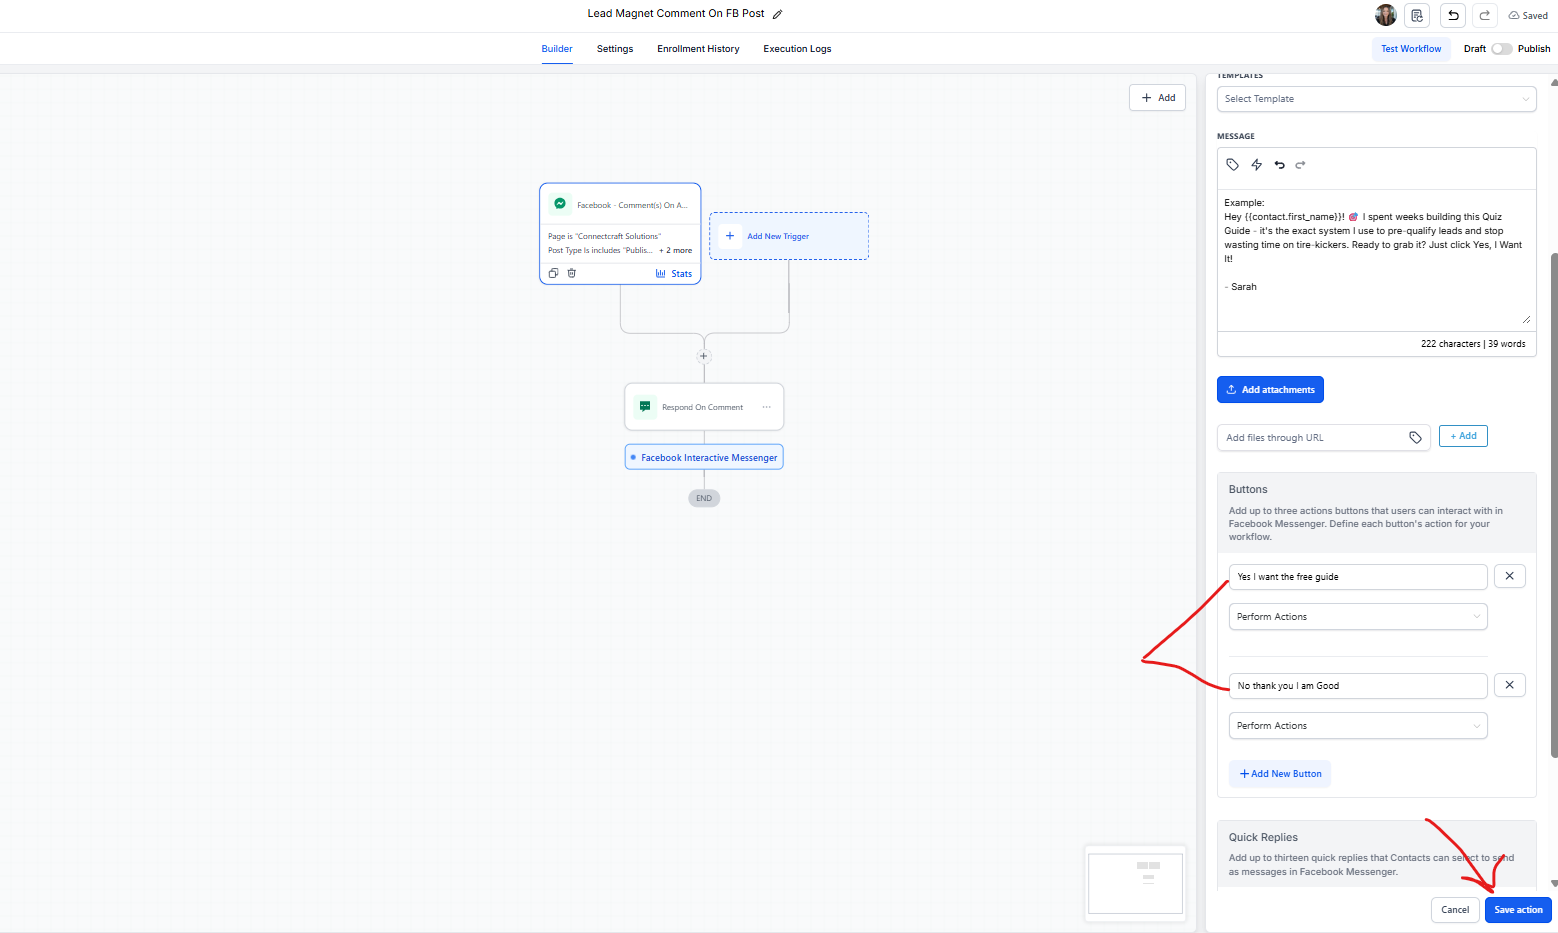
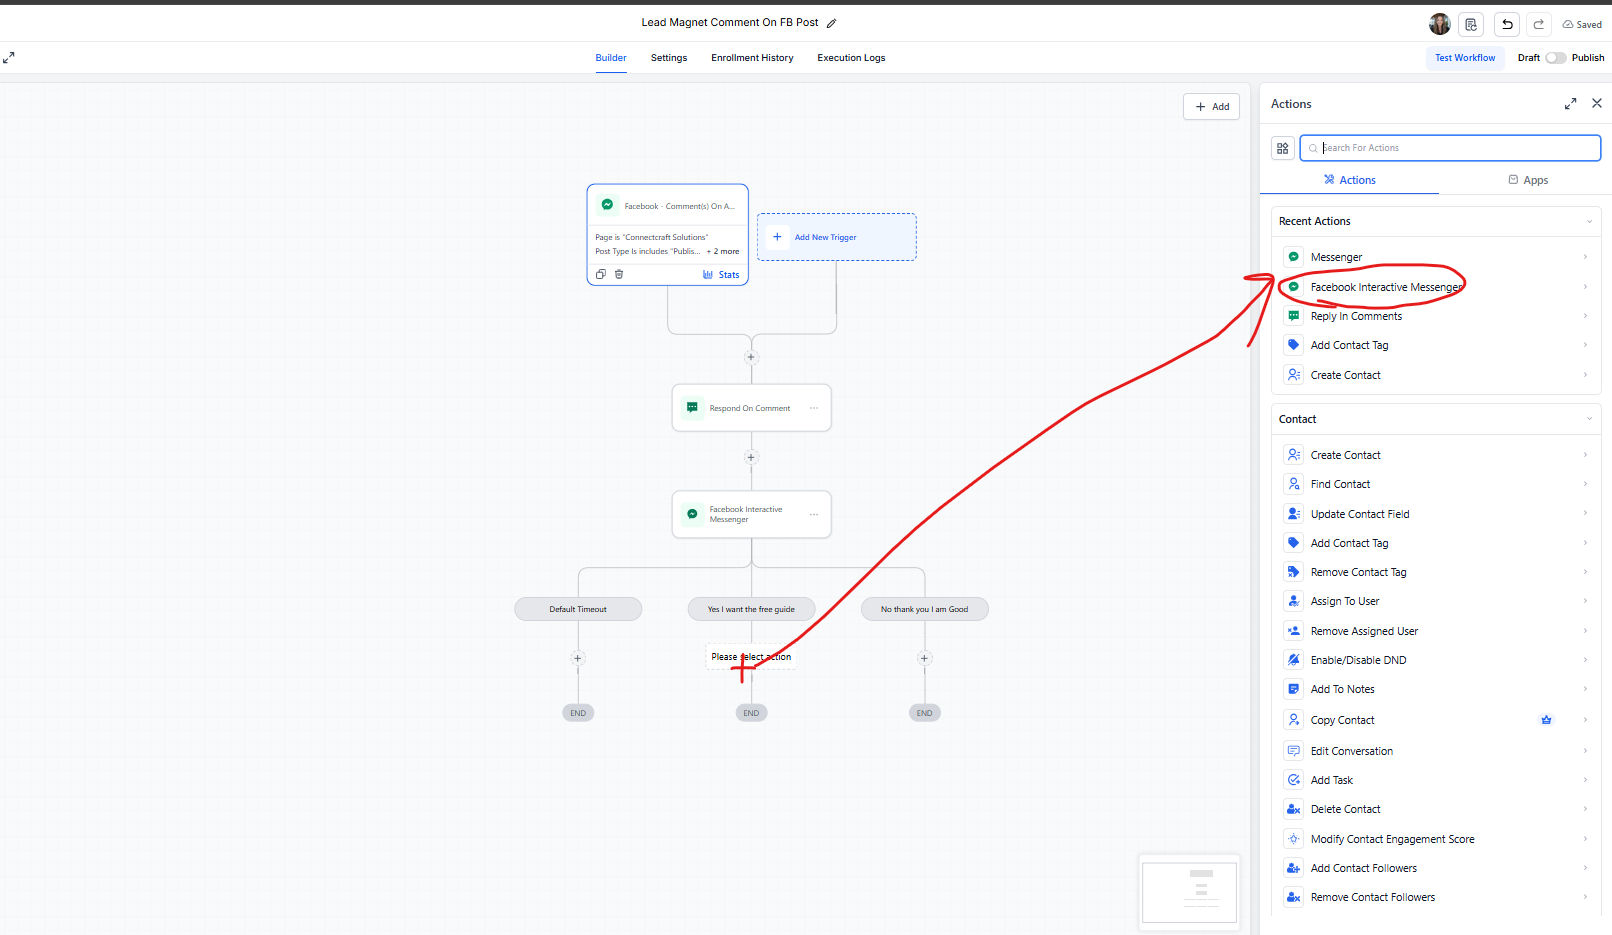
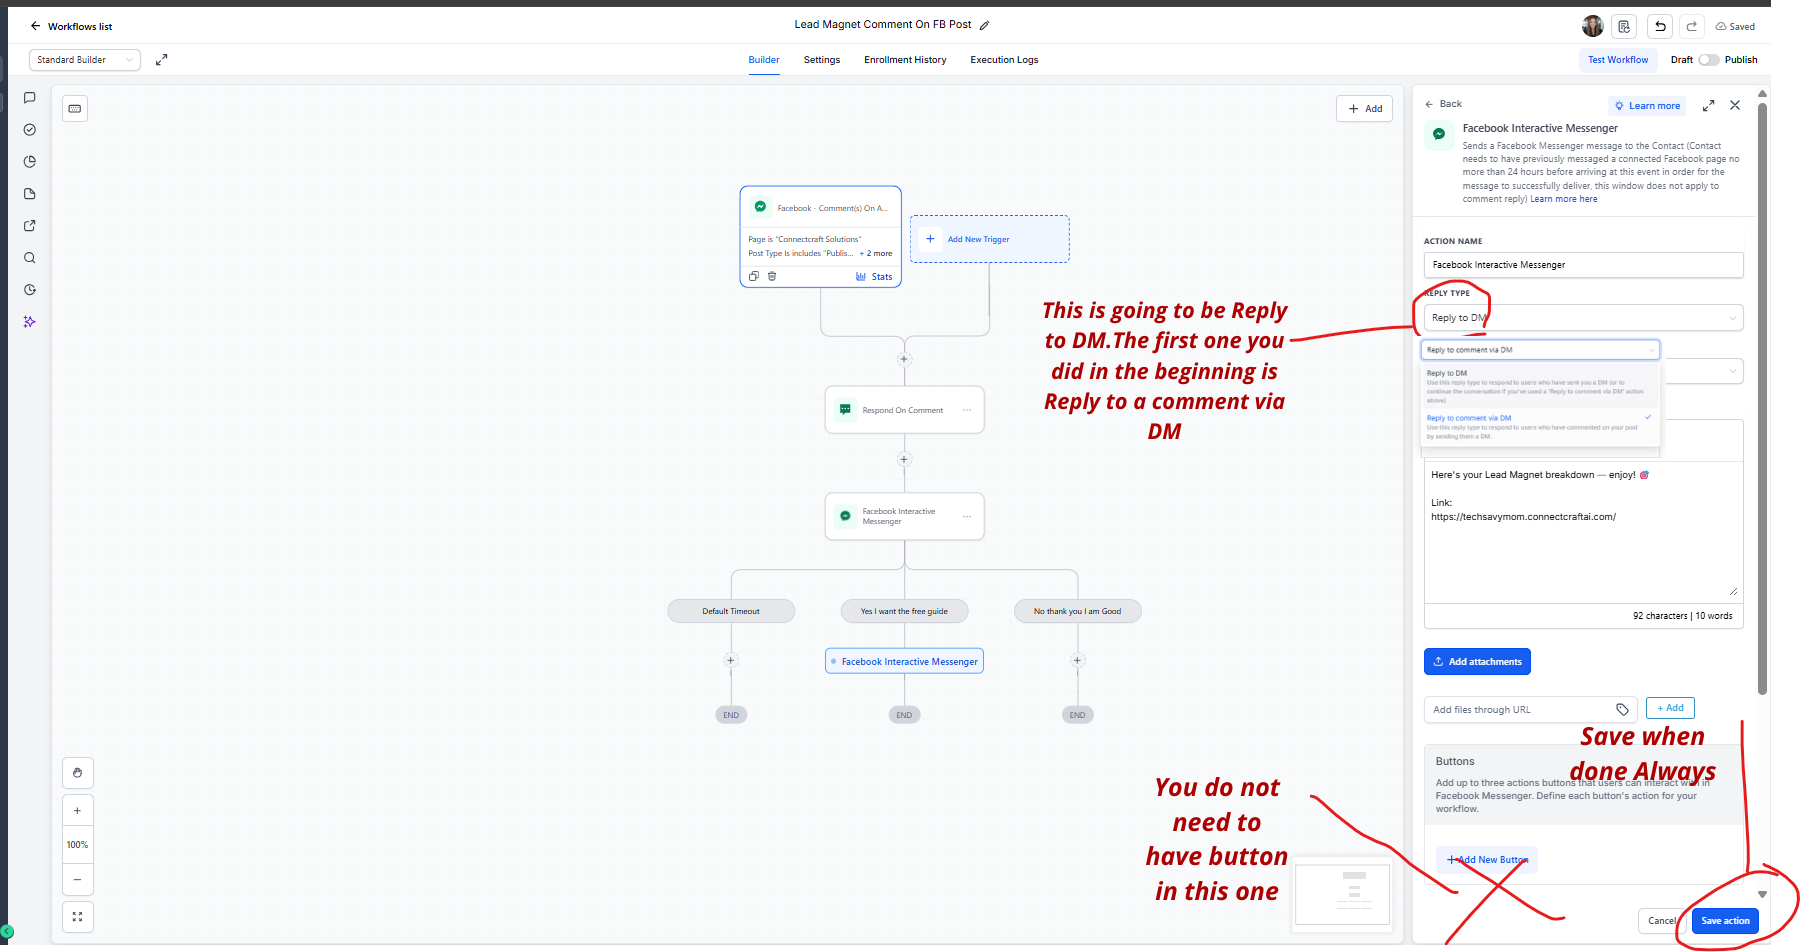
Click + Add Action and choose Send Interactive DM for Facebook Messenger. Write the first message, add a Yes, I Want It button, and optionally add a No, I’m Good button. Under the Yes button, add another interactive Messenger step and set this one to Reply to DM for the reply type.

Add the Send Interactive DM action for Facebook Messenger
Configure the interactive Messenger DM action
Add the button options for the first Messenger message
Add the second interactive Messenger step as Reply to DM
06

Create the Delivery Message

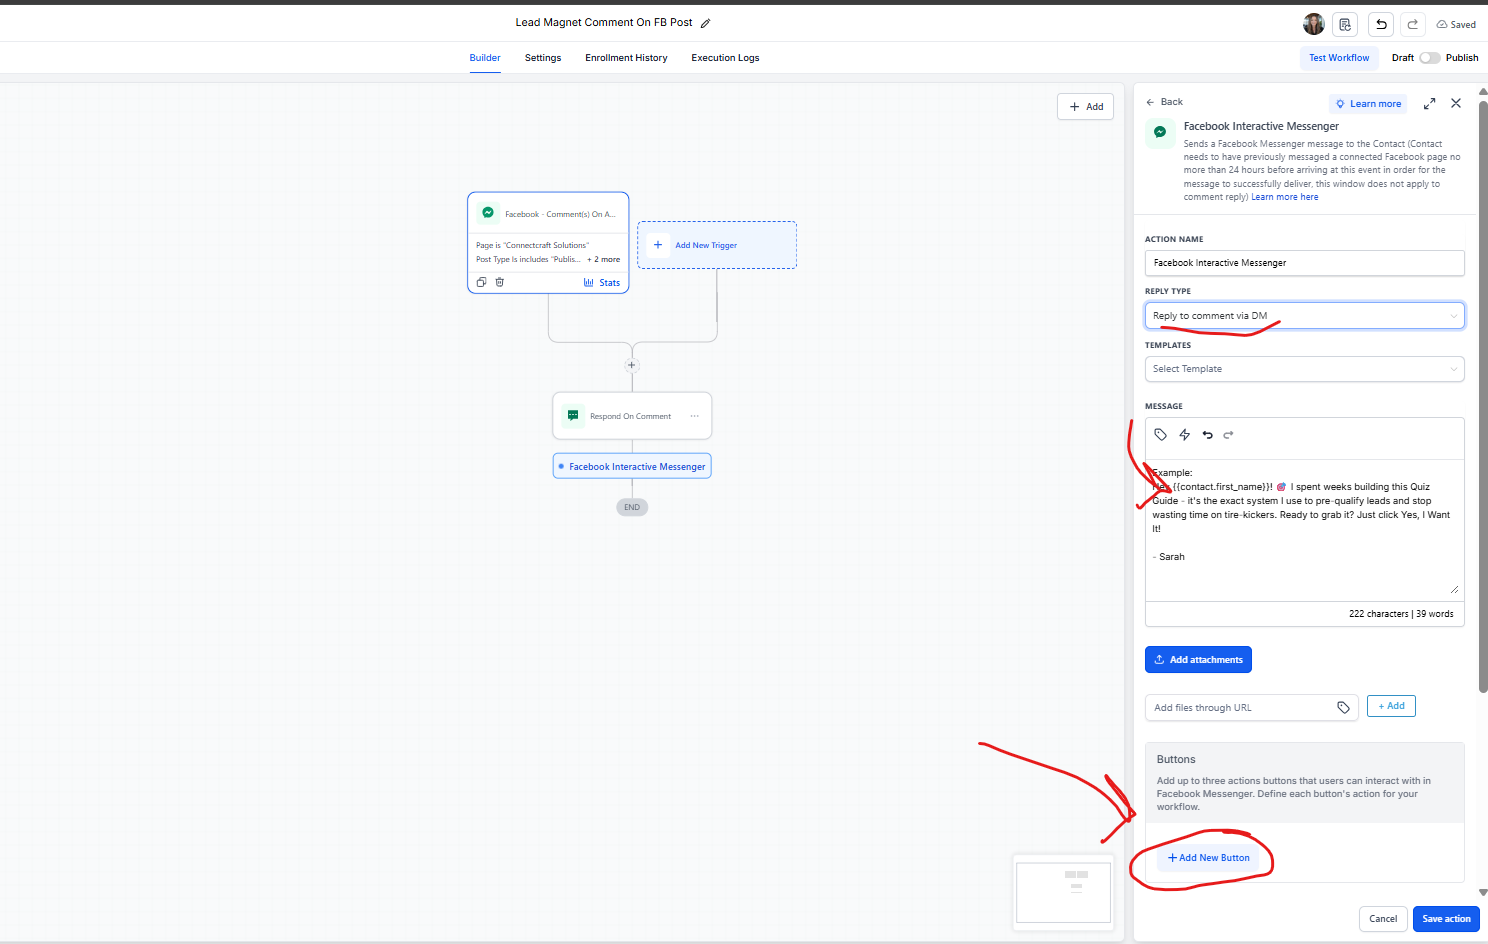
Create the message that contains the link to your lead magnet, or attach the file directly in the message. You do not need buttons in this final delivery message unless you want to send people to another page or next step.

Create the final delivery message with the lead magnet link or file
Completed workflow with comment reply and DM actions
07

Test It Out

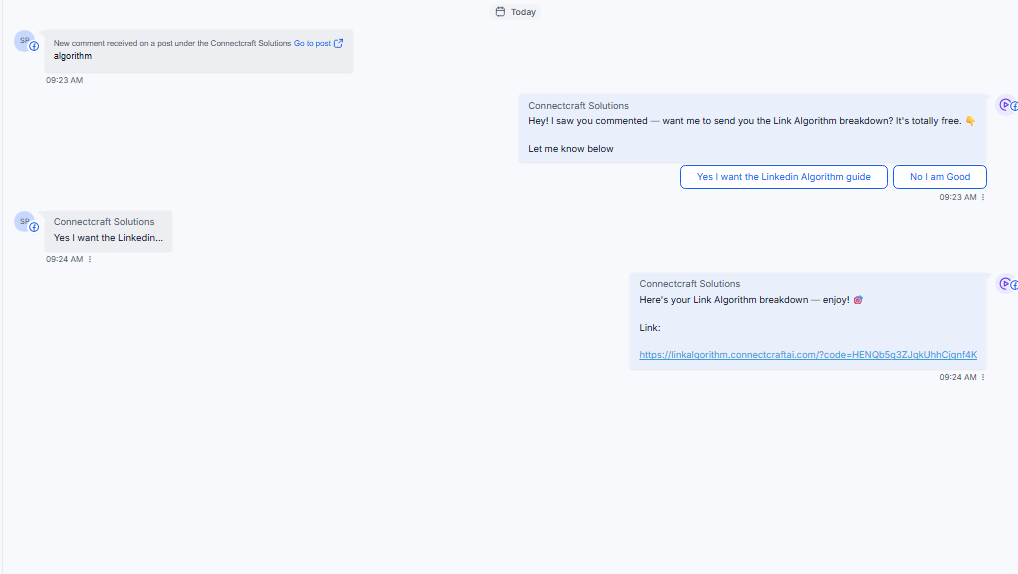
Using another Facebook account, find the post and comment the keyword on it. Then check HighLevel Conversations to confirm what someone sees after they comment and move through the automation.

HighLevel Conversations result after testing
08

Full Flow at a Glance

Someone comments FREE on your post. The workflow triggers, the public reply tells them to check their DMs, and the DM sends the lead magnet link plus a CTA button.

Full automation flow at a glance
Pro Tips for Coaches

Use a short keyword

Words like FREE or YES create less friction and get more comments.

Pin the campaign post

More visibility gives the workflow more chances to trigger.

Test with another account

Catch permission, keyword, and DM issues before going live.

Add a tracking tag

Use a tag such as Lead Magnet Download so you can segment people later.

Social Planner

Review comments by platform.

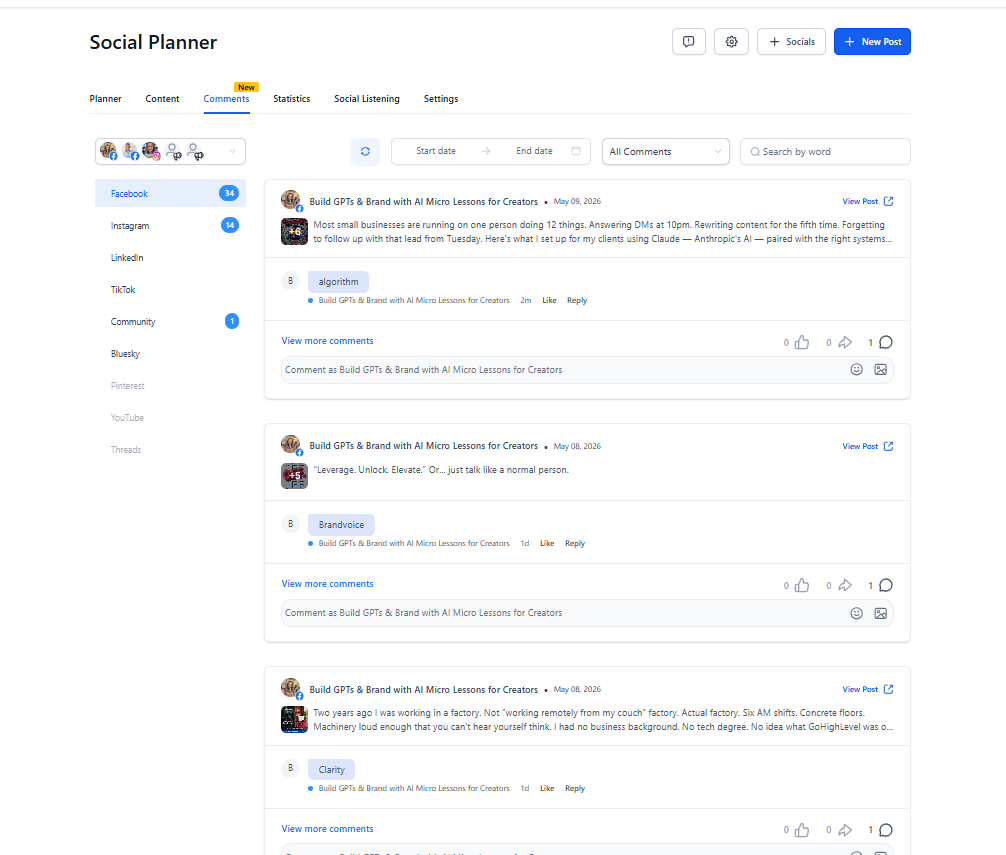
HighLevel’s Social Planner area can help you review Facebook engagement and keep platform activity organized while your comment automation is running.

Social Planner comments organized by platform

What gets collected automatically?

When someone comments and the workflow fires, HighLevel can create a contact using the information pulled from that person’s Facebook profile — primarily their name. That is the auto-collected part.

What about email and phone?

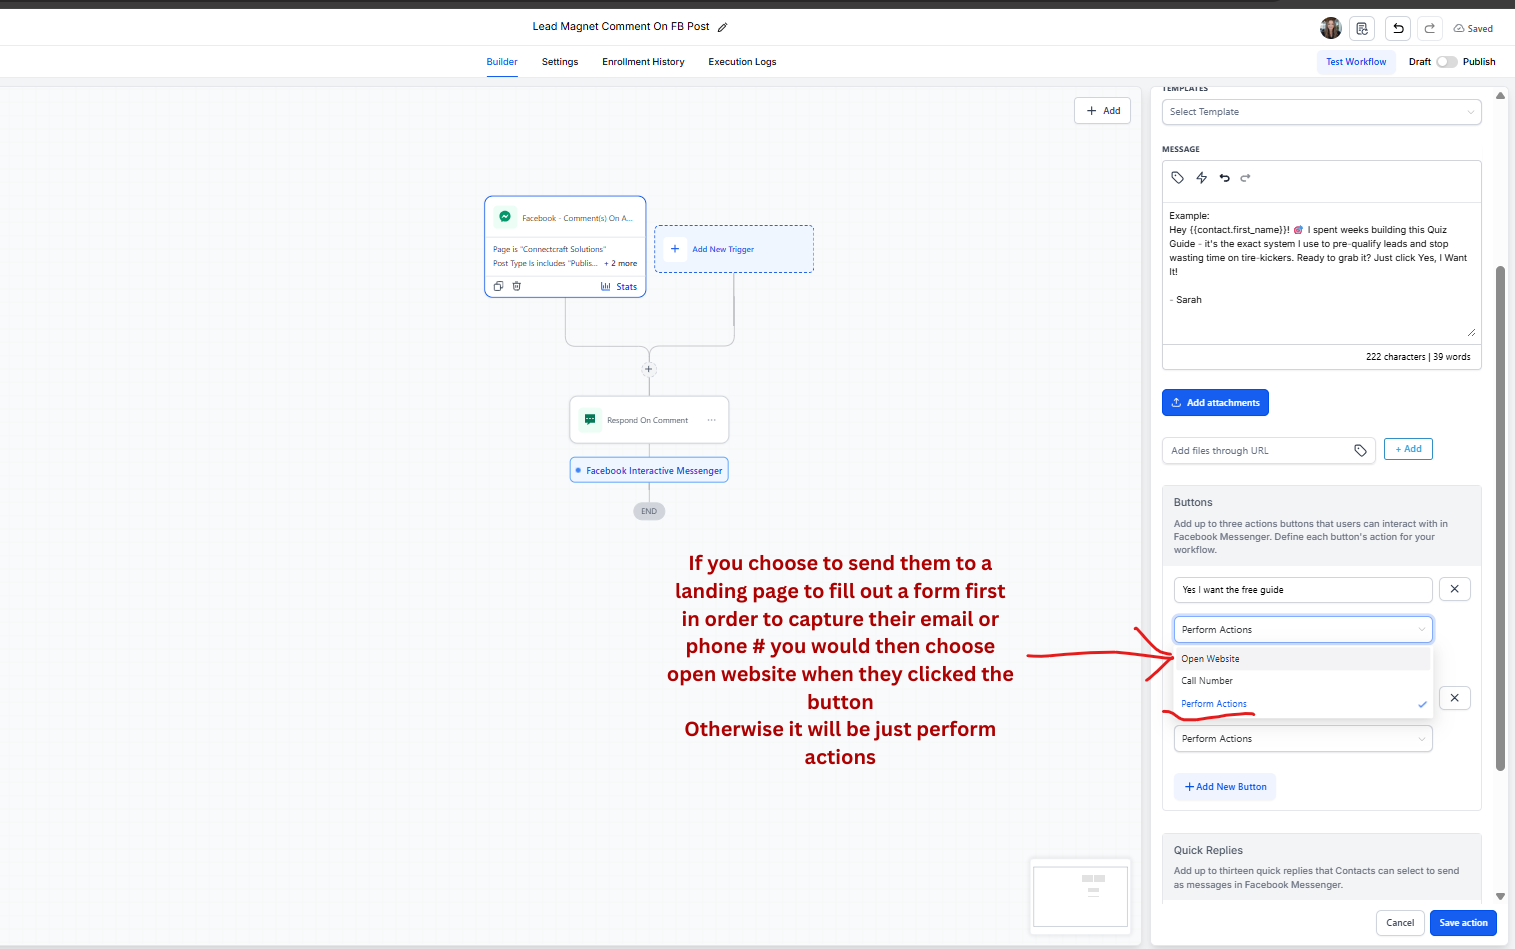
This is where it gets important. Coaches usually handle email and phone in one of two ways: collect the details conversationally inside the DM, or send the person to a landing page or form before delivering the lead magnet.

Option A — Collect via the DM conversation

If they type their email in the chat, it can automatically save to the contact record. If they type their phone number, the same thing can be saved. This feels conversational and low friction, but people may not always reply.

Option B — Send to an opt-in page or form

Instead of delivering the lead magnet directly in the DM, send a button or link to a funnel page with an opt-in form. They fill in their name, email, and optional phone number before they get the lead magnet.

The full picture: comment keyword → contact auto-created from Facebook name → DM sent with opt-in link → person fills out the form → full contact info is saved and the lead magnet is delivered.